Bearded irises can be divided beginning a few weeks after they finish blooming. This is the start of their dormant period. Dormancy continues until new growth begins.
It is important to divided irises every four years, otherwise they will stop blooming.
Dividing Irises step-by-step
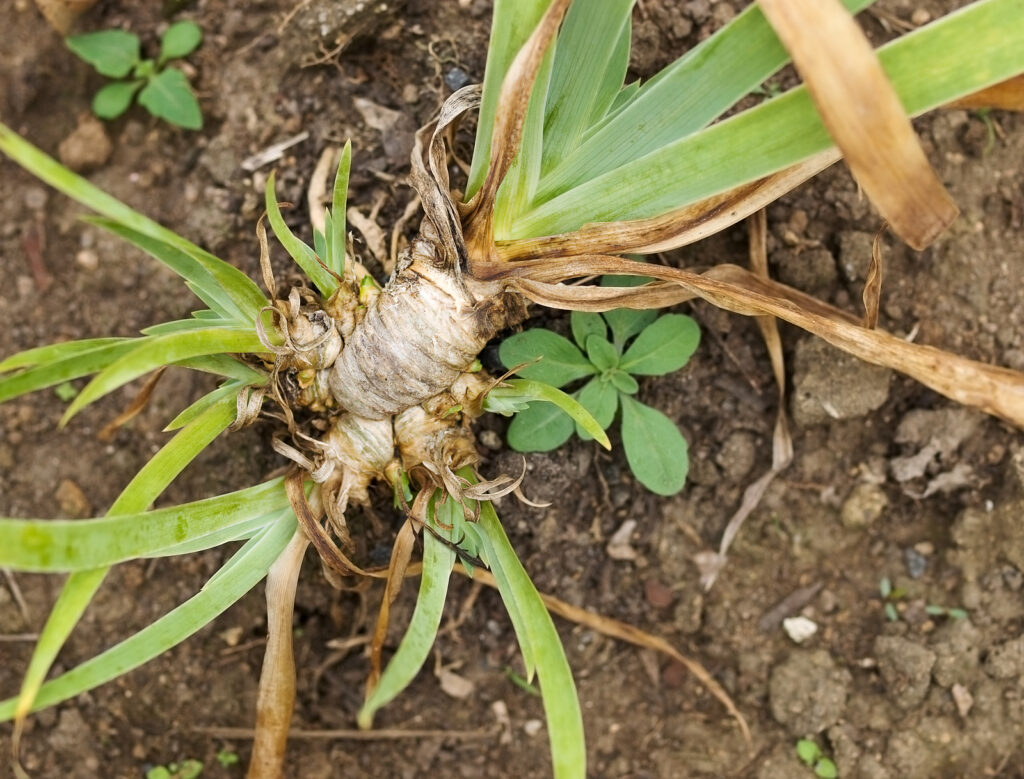
- Lift the plant’s rhizome. The rhizome is a stem-like structure that grows along the soil’s surface. It will likely be brown or a dark cream color; it looks like a thick, horizontal stem. Use a spading fork, a spade, or shovel to carefully lift the rhizome. Thin roots will extend from the rhizome. Keep as much of the root attached as possible.
- Wash the soil away from the roots and rhizome.
- Trim the fan of strappy leaves to about 6 inches (15cm) long.
- The rhizome will be long; on the ends of the rhizome will be healthy leaves attached to the rhizome. In the center will be the old, nearly dead rhizome with no leaves attached.
- Use a knife or pruners to cut away the healthy rhizomes; fans of leaves should be attached to each section you plan to replant. Discard the old, center section of rhizome. Cutaway any soft spots or any sections that look like they have been damaged. Remove any disfigured leaves and old bloom stalks.
- Dust the newly cut sections of rhizome with a fungicide; let the newly cut sections sit in the sun for several hours so the cuts will heat.
- Choose a spot in full sun to replant the rhizomes. Dig a shallow hole about 2 to 3 inches deep and wide enough to spread out the rhizome’s roots.
- Soak the hole with water and create a little mound of soil in the center of the hole on which to set the rhizome.
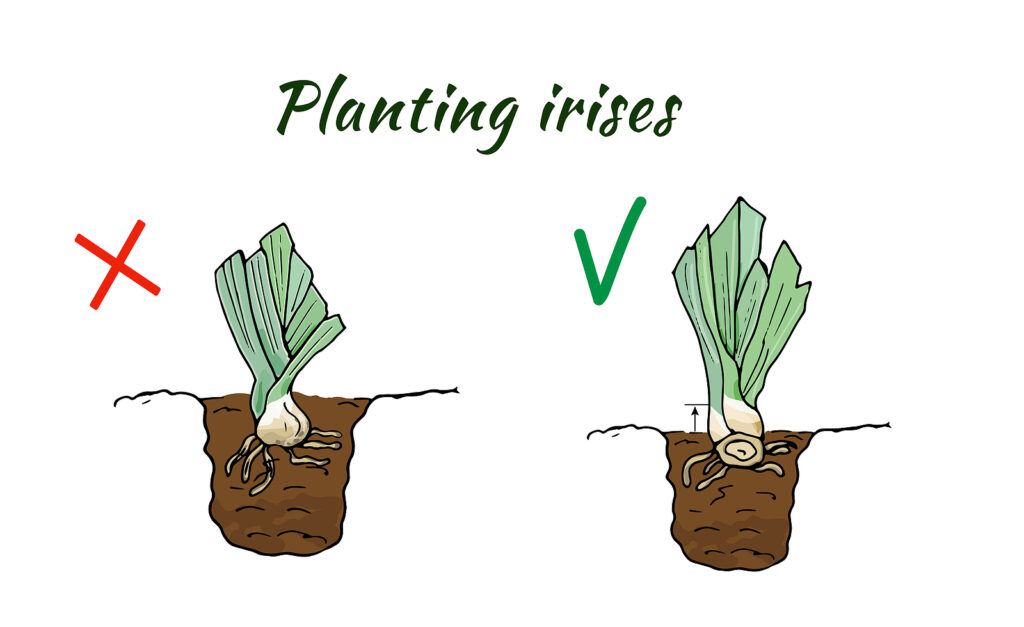
- Replant the healthy rhizomes with the tops just below the surface. Irises grow in the direction of the fan of leaves; so place the fan with the direction you want the plant to grow in mind.
- Set the rhizome in place and spread the roots out, around, and down the mound. Cover the roots and rhizome with soil. The rhizome should not be buried more than an inch deep.
- You can plant a clump of irises; set three rhizomes with the fans of leaves pointing out from the center.
- On a hillside, plant rhizomes so the leaves are pointing downhill.
- Be sure the rhizomes are set just below the soil surface, not deeper. Water the newly planted rhizomes well to settle the soil in around the rhizomes.
- Allow the rhizomes to dry before you water again.
- The leaves will begin to grow back with the middle leaves being the tallest.
Growing Irises
The bearded iris (Iris germanica) does best in full sun and average, well-drained soil. It needs moderate moisture but is drought tolerant once established.
The bearded iris can grow to 27 inches (68cm) tall with blooms 4- to 8-inches (10-20cm) across.
Also of interest: